How to create an ombré staircase –
One of the first projects I completed in our house was our staircase. It wasn’t easy, but it was one of the first things I wanted to cross off my list as I knew it would give us a lift every time we came home.

It wasn’t too expensive either, as I bought one custom mixed tin of satin Valspar paint from B&Q and mixed it with a cheaper white satin in increasing amounts.
Before
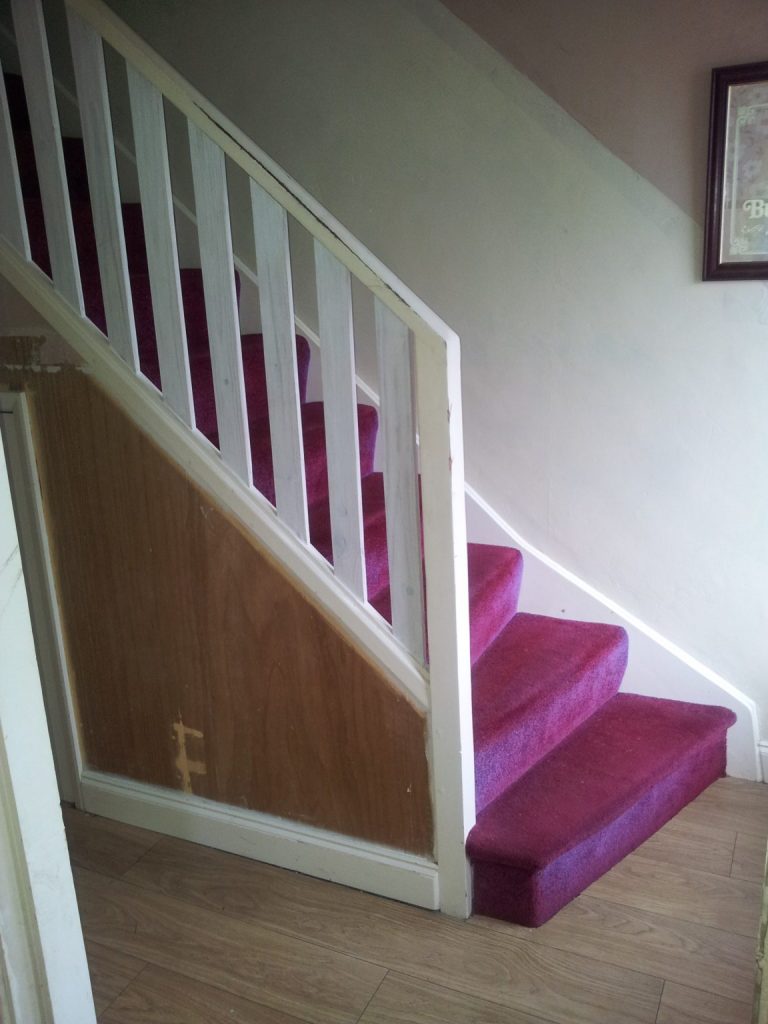
The stairs were covered in a very strange, almost iridescent pink-purple carpet when we bought the house. The worst bit, though, was the smell. It was stained, smelly and unsalvageable. We ripped it up straight away, but then we had to contend with the paint underneath.
Preparation
Stripping and sanding the stairs was the absolute worst part. I tried a caustic soda solution as well as a heat gun and scraper, and then we sanded with an electric orbital sander. It was a messy, difficult job. But then, hooray! I got to do the fun bit at last!
How to mix paint in a gradient
If you want to paint your stairs like this as well, I’d recommend getting a set of containers for mixing your paint, and using a measuring spoon you’re not too fond of, as it’ll be thickly coated in paint by the time you’re done.
Number the lids and sides of your containers as well, as you won’t see the difference between steps very easily.
I started by marking a container for each riser, with 1 at the bottom and 12 at the top. The top riser was number 13, but was painted in paint straight from the original pot, with no white.
Then, I measured out each pot according to its number.
Every riser had to add up to thirteen, so number 12 got 12 scoops of green and one scoop of white; number 11 got 11 scoops of green and two scoops of white and so on, until at the bottom, number one got 1 scoop of green and 12 scoops of white paint.
Really simple! just use the amount of stairs in your staircase to work out your gradient.
I’m so pleased with how this one turned out, and how cheap it was! Considering how expensive decorating a house can be, saving money on projects like these is essential.
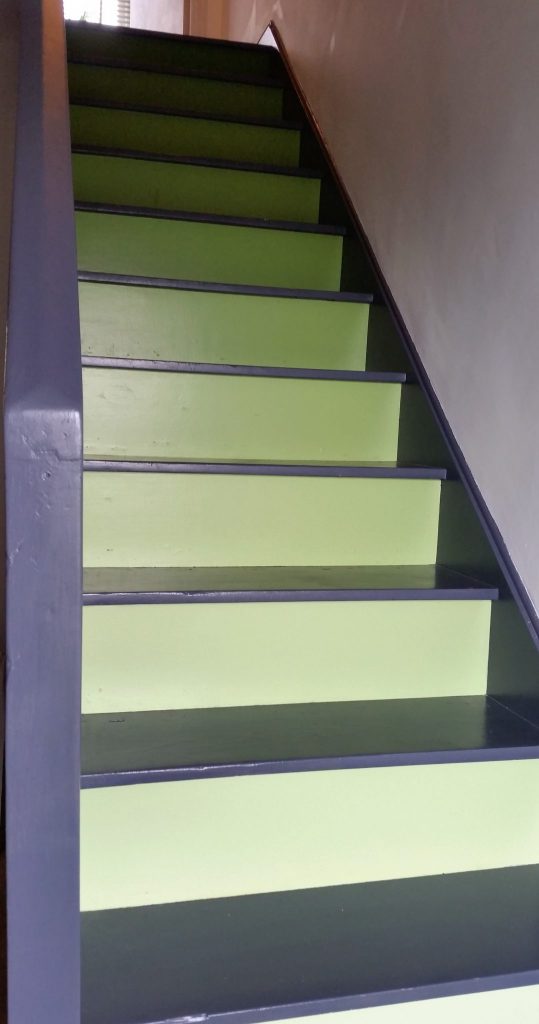
Well, what do you think of my painted staircase? Fancy trying a project like this one?
Update – Have a look at my completed house!



4 Comments
I love this, well done you! Sounds like it wasn’t expensive either!
Thanks Katy, it wasn’t pricey at all!
Perfect and simple. About to embark on my own fifteen steps…
Thanks Sarah! I hope your project goes well 🙂